Files: UIBlur.shader
Path: “CGF/Shaders/UI”
Shader menu: “CG Framework/UI/UI Blur”
Asset Store
Description
UI shader that applies a blur effect to the content behind the object with the shader.
- Support all UI features like alpha clip or masks.
- Five blur modes: Simple, Medium, Advanced, Box and Gaussian.
- Two use types: Texture (All render pipelines) and Grab pass (only for Built In).
Reference
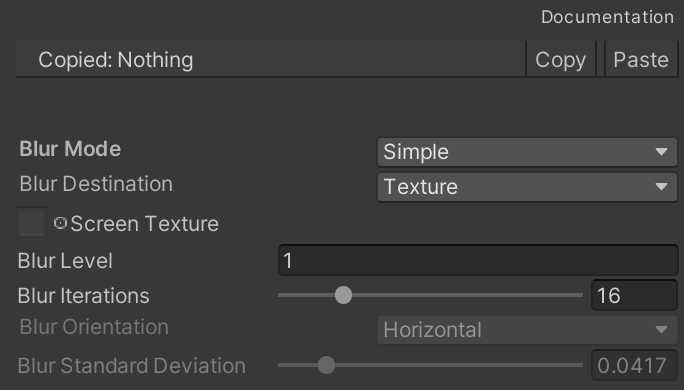
Blur – Manages the blur effect.
Use
You can use sevaral procedures to use the shader to apply the blur effect:
- Option 1 – Render Texture:
- Built In:
- Only affects opaque and transparent world object, not canvas objects.
- Only support Screen space – Overlay of Canvas Render Mode.
- Create a material with this shader and assign the material to the Material property of Image component of a canvas object.
- Create a secondary camera in the scene.
- Create a render texture.
- Drag the render texture to the “Target Texture” property of the secondary camera.
- Add the script CGFSetRenderTextureSizeFromCameraBehavior to the object with the Image component and the material.
- Drag the render texture to the “Render Texture” property of CGFSetRenderTextureSizeFromCameraBehavior.
- Set the value of the “Size Multiplier” property of CGFSetRenderTextureSizeFromCameraBehavior. 1 or 0.5 is suitable for a good blur effect.
- Drag the Main Camera of the scene to the “Main Camera” property of CGFSetRenderTextureSizeFromCameraBehavior.
- Drag the render texture to the “Screen Texture” property of material.
- Press play to see the effect.
- URP:
- Only affects opaque and transparent world object, not canvas objects.
- Only support Screen space – Overlay of Canvas Render Mode.
- Create a material with this shader and assign the material to the Material property of Image component of a canvas object.
- Create a secondary camera in the scene.
- Drag the render texture to the “Output Texture” property of the secondary camera.
- Create a render texture.
- Add the script CGFSetRenderTextureSizeFromCameraBehavior to the object with the Image component and the material.
- Drag the render texture the “Render Texture” property of CGFSetRenderTextureSizeFromCameraBehavior.
- Set the value of the “Size Multiplier” property of CGFSetRenderTextureSizeFromCameraBehavior. 1 or 0.5 is suitable for a good blur effect.
- Drag the Main Camera of the scene to the “Main Camera” property of CGFSetRenderTextureSizeFromCameraBehavior.
- Press play to see the effect.
- Built In:
- Option 2 – Screen Texture:
- Only for Built In render pipeline.
- Only affects opaque and transparent world object, not canvas objects.
- Only support Screen space – Overlay of Canvas Render Mode.
- Create a material with this shader and assign the material to the Material property of Image component of a canvas object.
- Create a secondary camera in the scene.
- Add the script CGFRenderImageToMaterialBehavior.
- Drag the material that uses the shader to the “Material” property of CGFRenderImageToMaterialBehavior.
- Enter the name of the texture in the “Texture Name” property of CGFRenderImageToMaterialBehavior. In this case is “_ScreenTex”
- Select the “Simple” option of the “Blur Mode” of the material.
- Configure the other properties of the material as you wish.
- Option 3 – Grap Pass:
- Only for Built In render pipeline.
- Affects all types of obejcts: opaque, transparent and canvas objects.
- Supports all Canvas Render Mode.
- Create a material with this shader and assign the material to the Material property of Image component of a canvas object.
- Select the “Grap Pass” option of the “Blur Destination” of the material.
- Configure the other properties of the material as you wish.